After you download Windows 7 ISO file, you need to create a bootable USB to install Windows 7. So in this article, I will guide you how to do that.
How to install Windows 7 from USB
Step 1: You download Windows 7 USB/DVD Download Tool
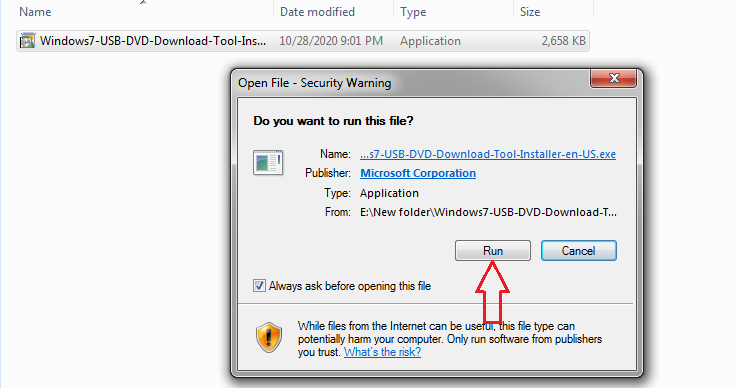
Step 2: You click the file you download and select Run to install the tool

Step 3: After you install the tool, you open it and select Browse. Then you link to the Windows 7 ISO file you download.


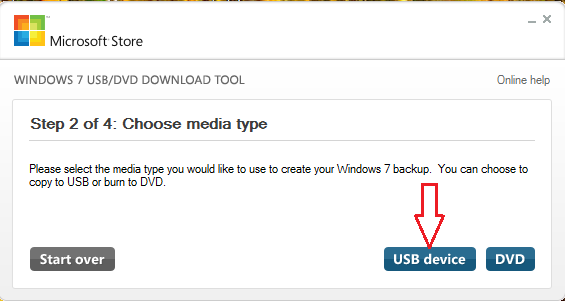
Step 4: You select copy to USB

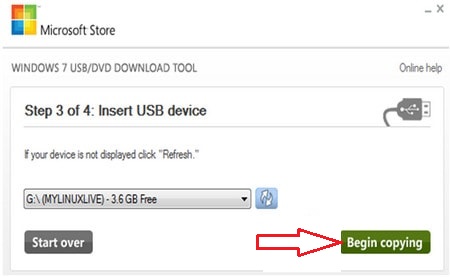
Step 5: You select USB you want to copy Windows 7 ISO file. Then you select “Begin copying”

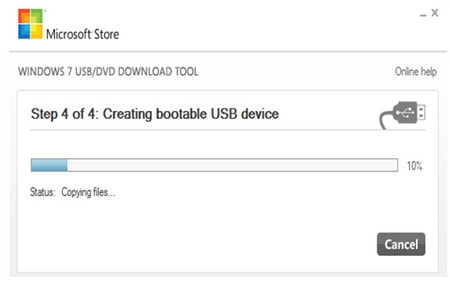

You will see Bootable USB device created successfully. Now you can close the tool.
Step 6: You restart your pc to go to Bios setup.
- If you use pc, you press F2
- If you use laptop Sony Vaio, you press F2
- If you use laptop Acer, you press F12 or F2
You can find keyboard shortcuts to access Bios setup here
Step 7: After you go Bios setup, you select Boot tab. You will see
- Hard Drive: boot from HDD or SSD
- CD-ROM Drive: boot from CD
- Removable Devices/External Drive: boot from USB
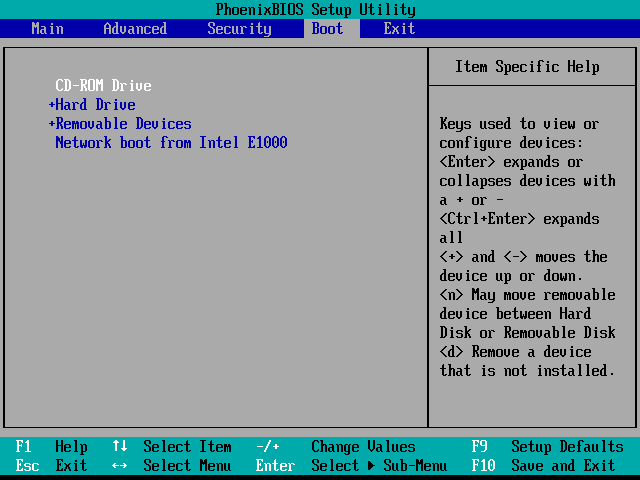

Step 8: You select Removable Devices/External Device first in the boot order. You use the keyboard ↑↓←→ to change it
Note: If you don’t find the option Removable Devices/External Device, you go Boot Configuration =>External Device Boot, then you change Disabled => Enabled
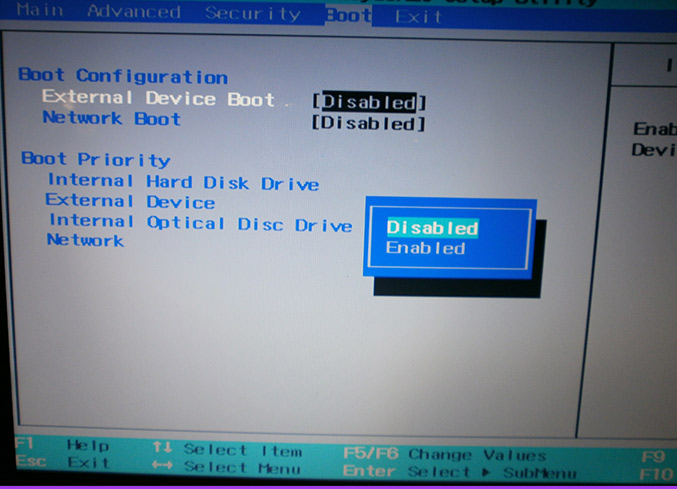

Step 9: You press F10 to save and exit BIOS.
Step 10: You select language, time and keyboard.
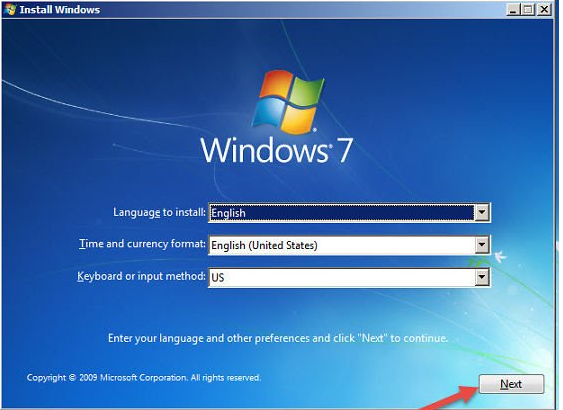

You click Next. Then you click Install Now
You do these next steps.
You can watch this video to know how to install Windows 7 from USB drive:

After you install Windows 7, you have 30 days to use it. You can buy Windows 7 product key to activate it. If you want to buy Windows 7 key ($25/key), you can visit https://saleproductkey.com/product-category/windows-7-product-key/. I sell Windows 7 Pro key, Windows 7 Ultimate key, Windows 7 Home Premium key, Windows 7 Enterprise key on this website.
You also use Wandriver to install drivers for Windows 7
Read more: